I will add to this as I can, including sections on our starter motor issues, MFU problems and others.

Those little problems that can take the car off the road, yet are often quick and cheap to fix - once you've identified them! I shall add sections on our starter/MFU problem.
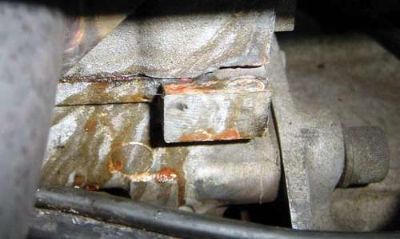
 Bleeding 2 Another coolant leak has been discovered! Again I spotted it running along the head-gasket split line, but traced it back up towards the inlet manifold, from where it is dripping down the block to the head gasket. Why is it leaking from here? Is it simply a case or replacing a gasket or tightening the manifold bolts? Photo is looking along the inlet side of the engine, from the back to the front. Bleeding 2 Another coolant leak has been discovered! Again I spotted it running along the head-gasket split line, but traced it back up towards the inlet manifold, from where it is dripping down the block to the head gasket. Why is it leaking from here? Is it simply a case or replacing a gasket or tightening the manifold bolts? Photo is looking along the inlet side of the engine, from the back to the front.
SOLUTION TO THE ABOVE! Many thanks to Dave Andrews of DVA power www.dvapower.com who helped me out on this one. The problem is a leaking inlet manifold gasket. The older ones were apparently (black) rubber and can crush/flatten/deteriate etc Straight swap for a new one - but make sure it is the updated GREEN version. I shall put a picture up. I need to change it asap, as water could be getting into the cylinder - not good!
At the same time, there are traces of coolant around the pressure cap on the expansion tank - have I overfilled coolant when I re-filled after repairing the last leak (water coolant rail gasket) Does over filling cause over pressure when hot, causing coolant to be forced out near the inlet manifold gasket?

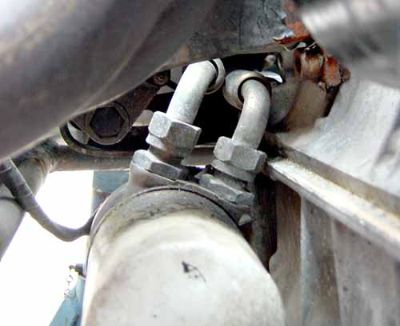
 Bleeding! I was very concerned one day to discover a coolant leak, which looked like it was coming from the Head Gasket joint. The coolant seemed to run from the rear nearside corner of the engine. Bleeding! I was very concerned one day to discover a coolant leak, which looked like it was coming from the Head Gasket joint. The coolant seemed to run from the rear nearside corner of the engine.
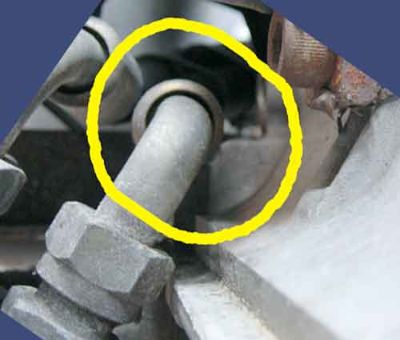
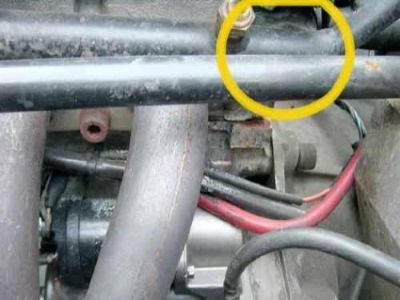 Source of the leak was actually the coolant rail, where it enters the head (behind the pipes in the yellow circle)Coolant was leaking from here, down onto the head gasket joint, and running along this - giving the impression of a leaking head gasket. Phew.. Source of the leak was actually the coolant rail, where it enters the head (behind the pipes in the yellow circle)Coolant was leaking from here, down onto the head gasket joint, and running along this - giving the impression of a leaking head gasket. Phew..
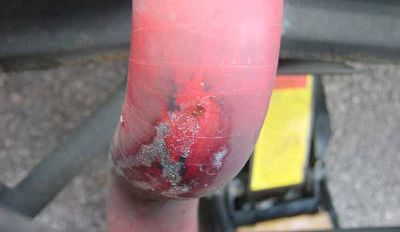 Spotted this leak on a general inspection. No idea how this could of been caused in the silicon pipes, but it is on the pipe that runs from the bottom of the radiator to the engine. Spotted this leak on a general inspection. No idea how this could of been caused in the silicon pipes, but it is on the pipe that runs from the bottom of the radiator to the engine.
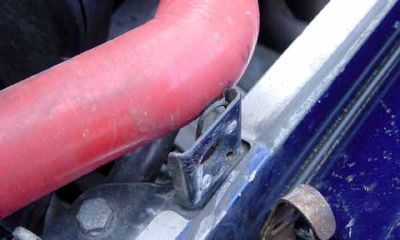 A potential leak spot, where the coolant pipe is rubbing on the nose-cone mounting bracket. Sliding the pipe further onto the water rail will solve this issue. A potential leak spot, where the coolant pipe is rubbing on the nose-cone mounting bracket. Sliding the pipe further onto the water rail will solve this issue.

When we came to fit our Apollo tank it was apparent that the instruction leaflet had unreadable pictures - hopefully these might help...
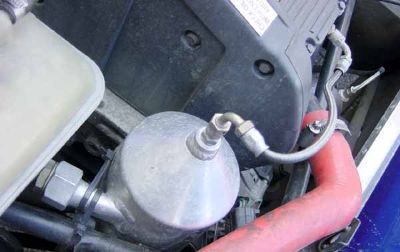
Peter C helped us fit our Apollo tank. His very neat installation has never leaked a drop of oil, and has certainly helped temperatures - particularly on the track. I will add more pictures to this series a bit later. I wanted to get some shots of the oil pipes coming out of the oil filter bracket, showing the critical angle of the unions, and the mod we had to do to the engine block for clearance - but I cannot access this point until I lift the car higher than a jack would allow!
 General View General View
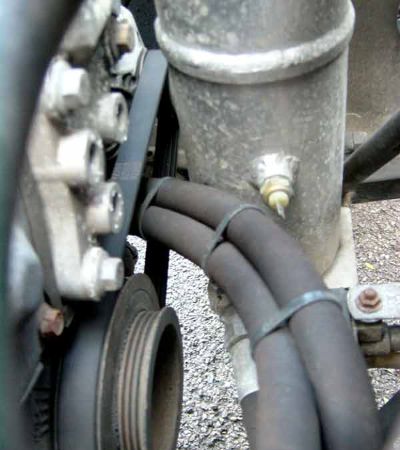 Showing how the pipes exit the oil filter bracket and route through the alternator belt. Note tie-wraps keeping everything neat (and preventing any chance of the pipes from touching the belt). Showing how the pipes exit the oil filter bracket and route through the alternator belt. Note tie-wraps keeping everything neat (and preventing any chance of the pipes from touching the belt).
 Pipe fitting that leads into the head. Loctite this well - there are stories of the nut inside working its way off and causing havoc within the head. Pipe fitting that leads into the head. Loctite this well - there are stories of the nut inside working its way off and causing havoc within the head.
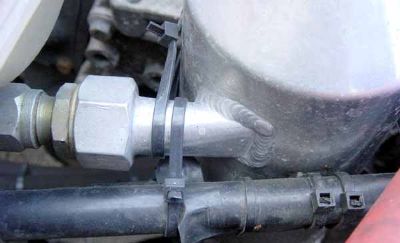 Apollo Tank is tie-wrapped to the chassis - quick and easy to remove if required. Be careful - the Apollo tank is thin alloy - over tightening of nuts can twist fittings Apollo Tank is tie-wrapped to the chassis - quick and easy to remove if required. Be careful - the Apollo tank is thin alloy - over tightening of nuts can twist fittings
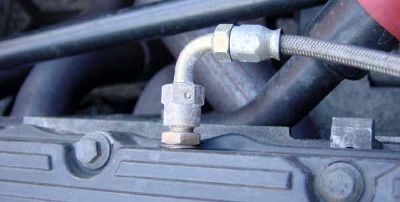
 The angle of the two elbow joints in this shot is critical to fitting the apollo tank. Note how the inner joint is angled out, away from the car slightly, and the outer one angles in, though less so. The angle of the two elbow joints in this shot is critical to fitting the apollo tank. Note how the inner joint is angled out, away from the car slightly, and the outer one angles in, though less so.
 Its hard to see, but you can just make out the part of the engine block that needed rounding off to allow the pipe to pass un-interrupted. This was done with a dremel type tool. Ensure rounded edges in case the pipe touches Its hard to see, but you can just make out the part of the engine block that needed rounding off to allow the pipe to pass un-interrupted. This was done with a dremel type tool. Ensure rounded edges in case the pipe touches

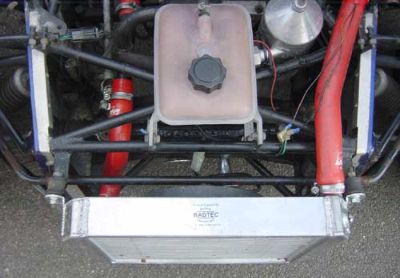
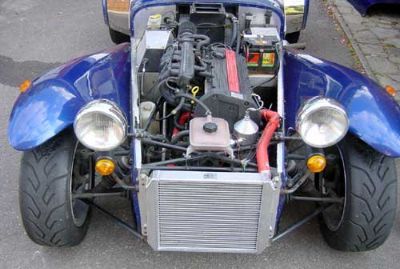 Nice new Radtec aluminum radiator just installed - the right way up now! Nice new Radtec aluminum radiator just installed - the right way up now!
 The wires that can be seen here are temporary, by-passing the notoriously unreliable fan switch, which has just broken. The wires that can be seen here are temporary, by-passing the notoriously unreliable fan switch, which has just broken.
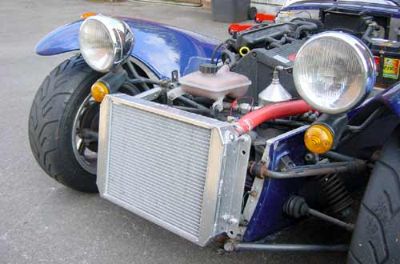 Looks pretty clean - for now! Looks pretty clean - for now!
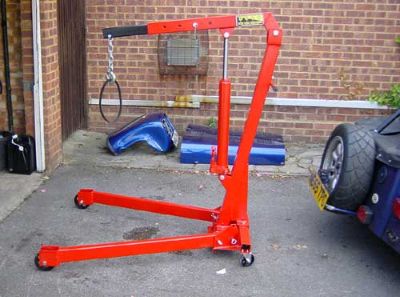 New purchase of a 1 tonne crane for work on the car. New purchase of a 1 tonne crane for work on the car.
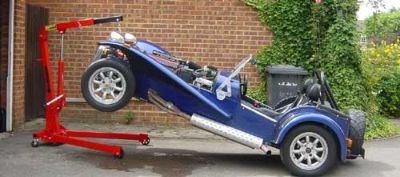 Crane in action. I am going to make some stands to go under the car for safety. Crane in action. I am going to make some stands to go under the car for safety.
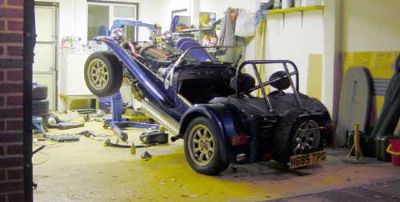 Peter's similar crane in action. It makes access to the under side of the car so much easier. I am going to make some supports to hold the car for maximum safety. Peter's similar crane in action. It makes access to the under side of the car so much easier. I am going to make some supports to hold the car for maximum safety.

Pictures of the home made sump guard fitted to Jeff's car in France. Made from 5mm aluminium plate, folded and creased. Jeff has a beautiful BDR engined car.
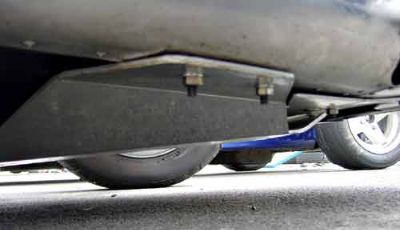 Side view. Side view.
 Looking back from the front of the car. Looking back from the front of the car.
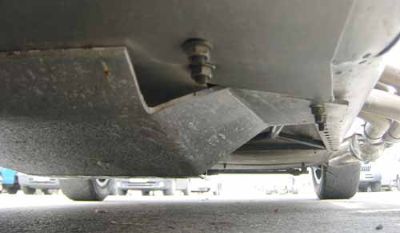 Looking down the side from the front of the car. Looking down the side from the front of the car.
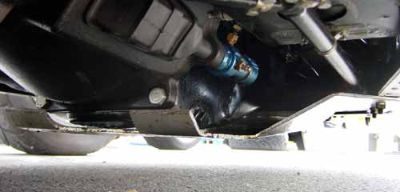 Looking back towards the front of the car from the back. Looking back towards the front of the car from the back.
|