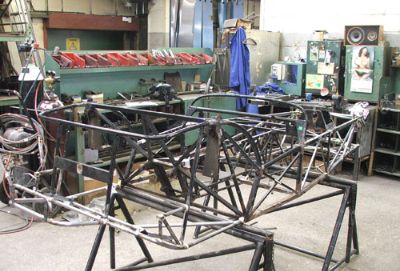
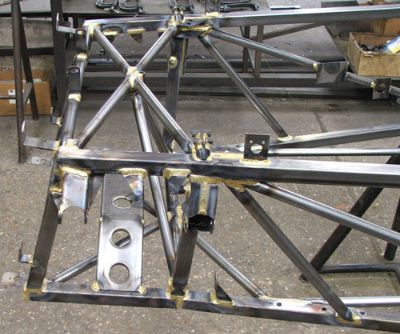
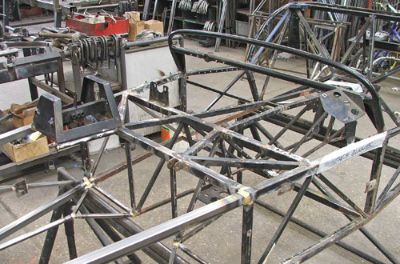
I had arranged to visit Arch in the middle of this process to see what it looked like and take some pictures. When I arrived all the main work had been done, and a new front had been grafted on, along with the new rear frame work.
 The car was now out of the jig. It looked a little odd seeing a brand new, clean front and rear of the car, sandwiching an as yet un-blasted middle section, with its rust and peeling powder coating! The car was now out of the jig. It looked a little odd seeing a brand new, clean front and rear of the car, sandwiching an as yet un-blasted middle section, with its rust and peeling powder coating!
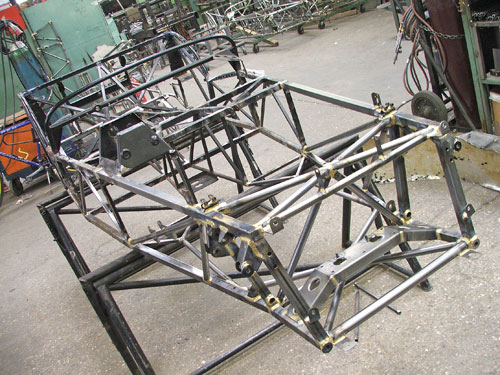
At the front, it was touch and go as to what we would do – replace certain tubes and brackets, or bite the bullet and fit a whole new long front. In the end we decided to go for the latter. Not only would this give us a fresh frame, it would also mean we would have the later, current suspension mounting geometry.
Interestingly, although this sounds drastic, racers report that the car actually feels stiffer after this operation, as the joints are strengthened with an internal tube. Other changes include a slightly different steering rack frame – the later ones have holes cut out, to reduce weight![url]www.mycaterham.com/Images/Rebuild/new
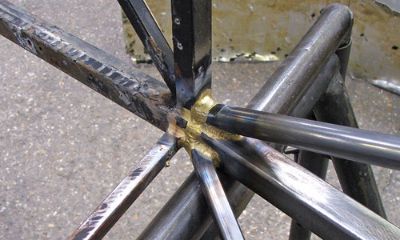
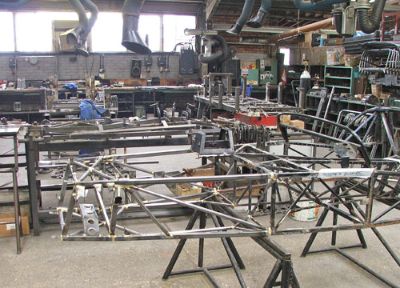
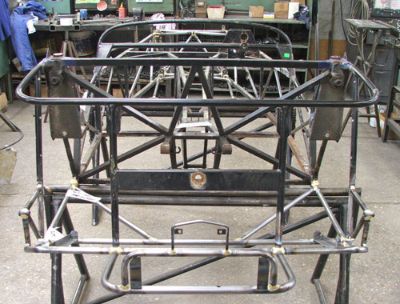
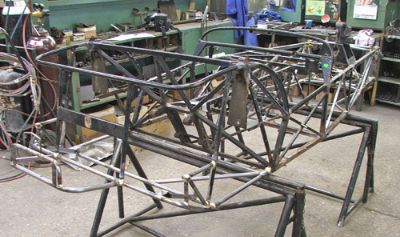
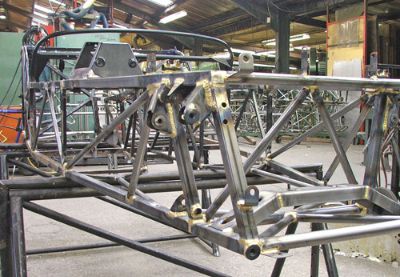
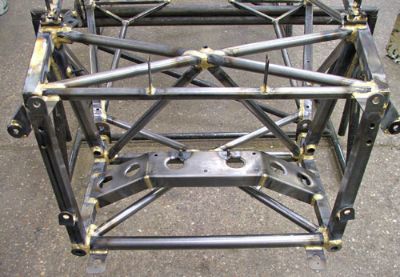
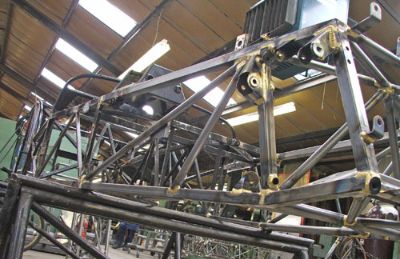
 Two things strike you when you first see an unpainted Caterham chassis at Arch. First, how many bits there are! Two things strike you when you first see an unpainted Caterham chassis at Arch. First, how many bits there are!
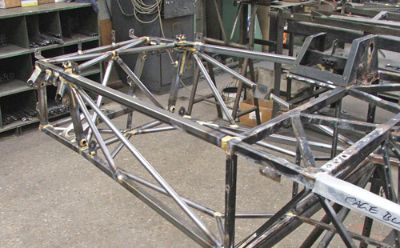
 The rear frame would be replaced. So many of the very exposed tubes in this area would have to be cut out and replaced, it is easier to just replace the whole frame with a new one. The rear frame would be replaced. So many of the very exposed tubes in this area would have to be cut out and replaced, it is easier to just replace the whole frame with a new one.
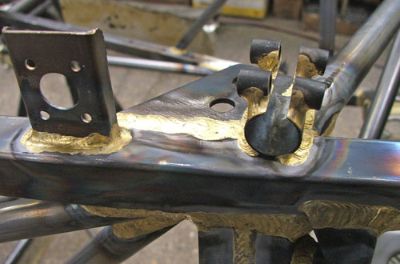
 We would take the opportunity to fit the watts linkage mounting points that later chassis have. We would take the opportunity to fit the watts linkage mounting points that later chassis have.
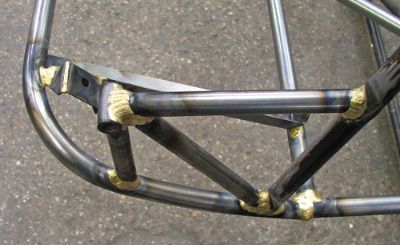
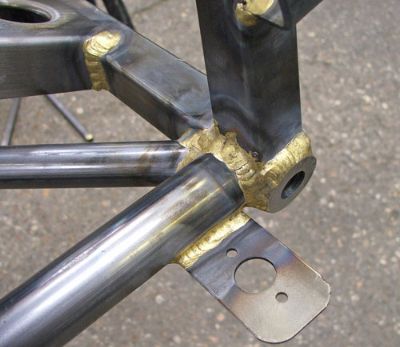
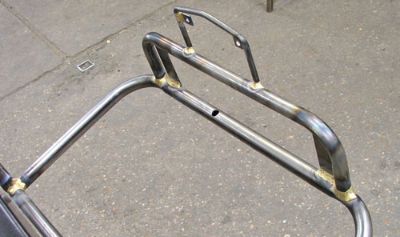 The spare wheel carrier would be cut off and replaced with the new-style version. Our existing carrier consists of a flat plate onto which the number plate can be fixed. The new style is formed from a formed bar, and is much neater. We will be keeping this feature because although often we don’t use it for a spare tyre, I am convinced of its value as a ‘bumper’ to protect the rear panel in slow speed parking incidents. The spare wheel carrier would be cut off and replaced with the new-style version. Our existing carrier consists of a flat plate onto which the number plate can be fixed. The new style is formed from a formed bar, and is much neater. We will be keeping this feature because although often we don’t use it for a spare tyre, I am convinced of its value as a ‘bumper’ to protect the rear panel in slow speed parking incidents.
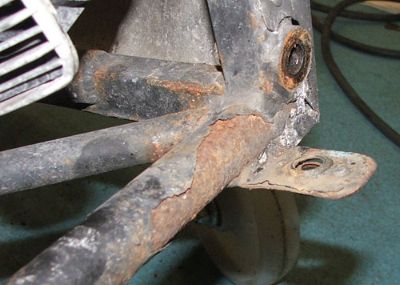
 One of the few bits on the chassis that show it was our ‘old’ car!! One of the few bits on the chassis that show it was our ‘old’ car!!
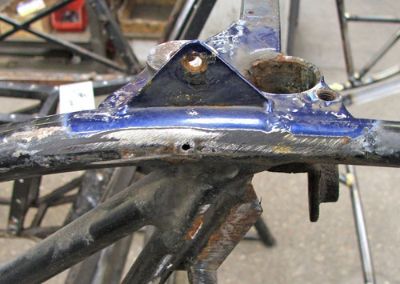
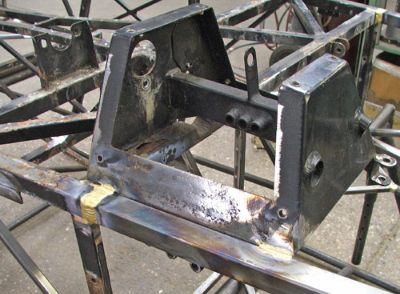
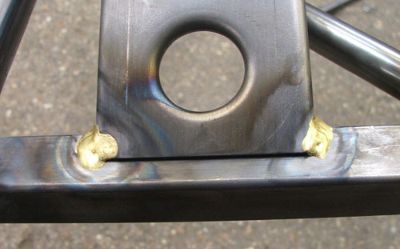
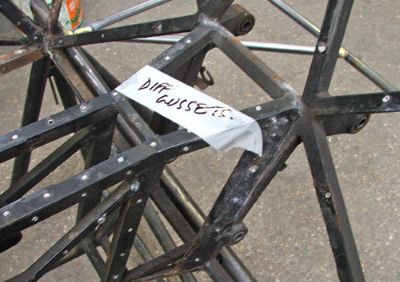 The diff mounts would be strengthened with gussets. I have seen a few of these go on older, more powerful cars, and although they are now made of a thicker guage steel, our early ones will be slightly thinner. Fine for normal use, but you never know how much power we might have in the future!! The diff mounts would be strengthened with gussets. I have seen a few of these go on older, more powerful cars, and although they are now made of a thicker guage steel, our early ones will be slightly thinner. Fine for normal use, but you never know how much power we might have in the future!!
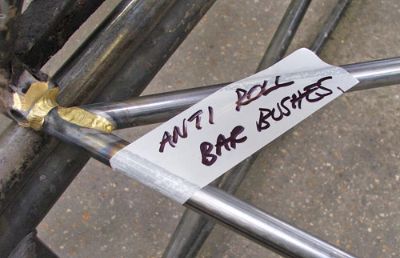 Any bushes that were missing on our car will be welded into place. This includes all bushes used for the cages, side impact bars etc. We may never fit them, but it means that in the future we can if we want to. Now is the time to do this sort of job. Having said that, I am seriously considering the fitting of the new-style side impact bar. Any bushes that were missing on our car will be welded into place. This includes all bushes used for the cages, side impact bars etc. We may never fit them, but it means that in the future we can if we want to. Now is the time to do this sort of job. Having said that, I am seriously considering the fitting of the new-style side impact bar.
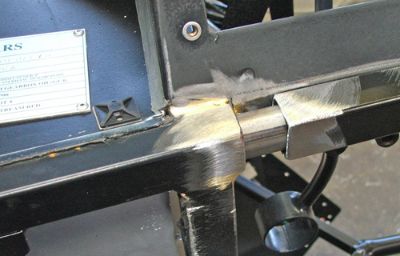
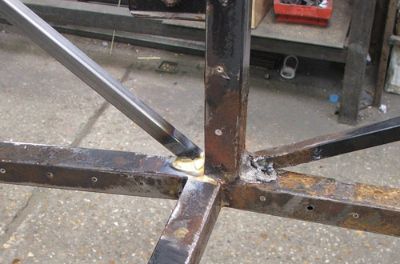 The small tubes that had showed bad rust had been cut out and replaced with new tube. The small tubes that had showed bad rust had been cut out and replaced with new tube.
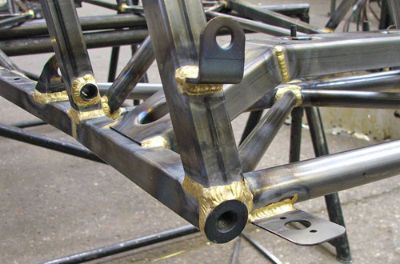
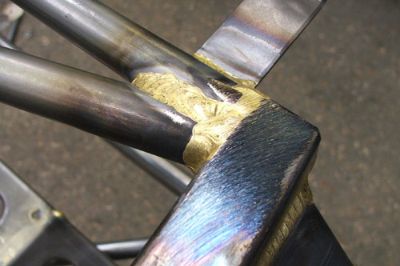
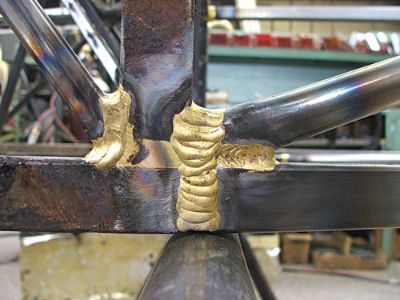
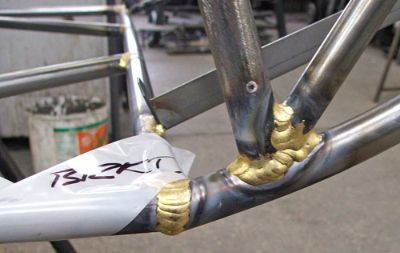
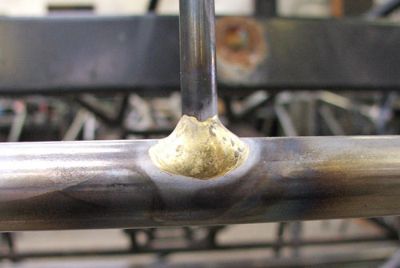
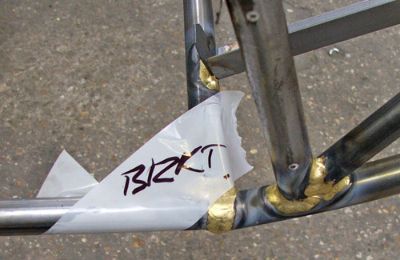
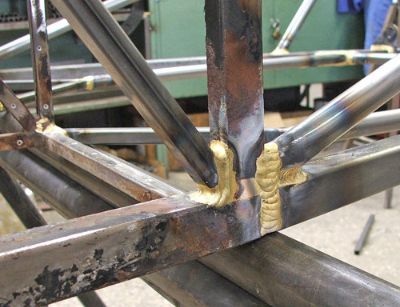
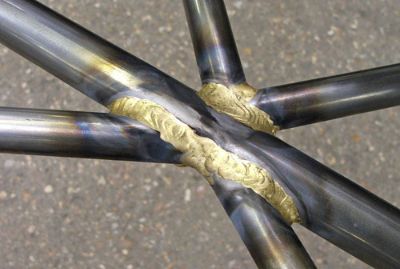
 Secondly you notice how neat all these joints are. Secondly you notice how neat all these joints are.
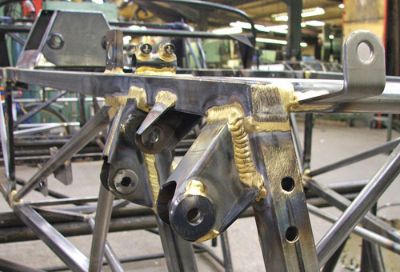
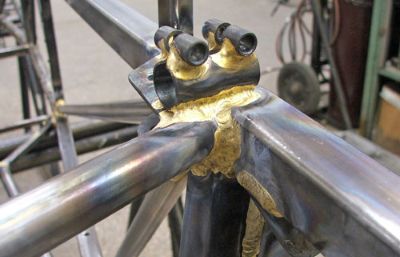 I mentioned this in passing, to be told that they could be far far neater, but obviously this adds time, and is not required for this sort of application. Its only when you see all the golden coloured braise joints that you truly understand how much work goes into hand making these chassis. I mentioned this in passing, to be told that they could be far far neater, but obviously this adds time, and is not required for this sort of application. Its only when you see all the golden coloured braise joints that you truly understand how much work goes into hand making these chassis.
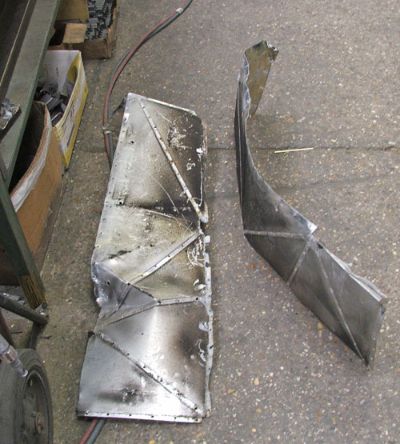 In fact, because our tunnel is not quite ‘standard’ Bruce had requested that I bring up the old internal tunnel panels that we had taken off, so that they could use them as a template for the rivet holes. A little past their best, but they will do the job as far as a guide goes! In fact, because our tunnel is not quite ‘standard’ Bruce had requested that I bring up the old internal tunnel panels that we had taken off, so that they could use them as a template for the rivet holes. A little past their best, but they will do the job as far as a guide goes!
I have arranged to visit Arch again next Saturday when the car should be finished off. Bruce has been very kind and agreed to let me help with this stage (not a normal service!!) – I’m very conscious of not getting in the way, but it will be nice to help rivet and fix the final few panels, and see how this stage is done. Even if you get your brand new Caterham in its most basic kit form, all this panelling will have already been finished, so it is a unique opportunity to take part in this process and will make our car even more ‘ours’ – if you see what I mean!!
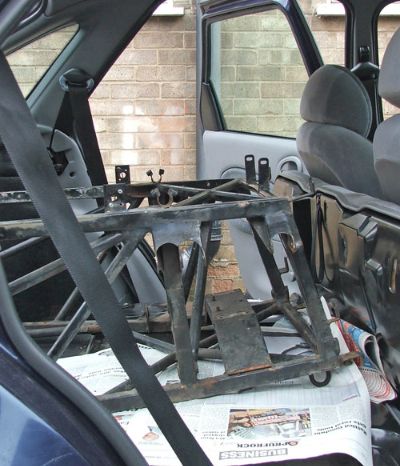
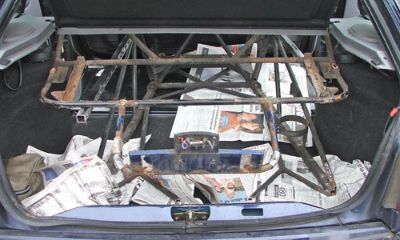
One final thing. As a serial hoarder I could not resist asking Bruce – ‘So, where are our ‘old’ chassis bits?’ Having mentioned it before, Bruce had put them to one side, and so unknown to Tessa, I loaded up these basically useless bits of rusty steel into the car before I left!!
[url]www.mycaterham.com/Images/Rebuild/in-car1.jpg[/url]
[url]www.mycaterham.com/Images/Rebuild/in-car2.jpg[/url]
Why?? I don’t know – they might come in useful??!! Decorate our garage if we ever get one of our own?? Not sure – actually I think the front section of chassis could make a nice wine rack…
As I left the car on Saturday, all that was left to do at this stage was add a few more brackets and bushes. Then the chassis would be blasted to clean off all the surface rust and old powder-coating. As the chassis is now a mixture of old and new, Arch will do this ‘in house’ so they have a greater control over which bits get blasted and which bits are left. Had the whole chassis needed blasting, it would have gone somewhere else for a complete blasting.
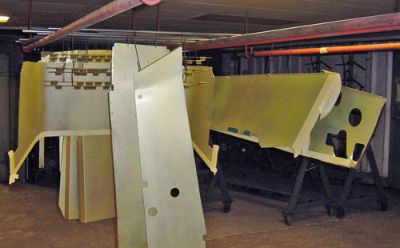
After full cleaning, the chassis will be powder coated, again in house at Arch. Then it is on to the panelling. New aluminium panels are riveted onto the chassis, in some cases having first been powder coated for extra protection.
|